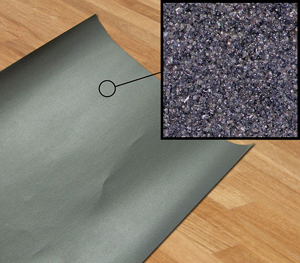
Sanding Wooden Worktops: A Worktop Express® Nutshell Guide
If you are purchasing worktops from us and are not opting to take advantage of our bespoke cutting service, you may think that a great deal of work is required prior to installation – but we’re pleased to say that it isn’t!
Our kitchen worktops are supplied sanded to a 150 grit finish as standard, a pleasing smoothness (the industry standard is just 120 grit); which means that the only additional action you need to take to ready the timber for installation is to apply two coats of Osmo Top Oil.
That said, we appreciate that customers may wish to sand the worktops further prior to or after installation; or, alternatively, you may wish to sand your worktops again in future as part of your maintenance programme – so we thought it would be helpful to provide some additional advice on sanding wooden worktops to a beautiful finish.
If intending to sand your worktop prior to installation, we recommend allowing your worktop to sit in the room of installation for 48 hours; this is so that the worktop can adjust to its new climate (it will experience a range of conditions during transit).
You can either sand your real wood worksurfaces by hand, or using an orbital sander, but we do not recommend belt sanders as it is very difficult to get an even finish on the worktop. If using an orbital sander, this should only be as a precursor to additional sanding by hand.
Before doing any sanding, please make sure that you wear an appropriate face mask. As some wood sawdust can cause allergies, it may be necessary to also wear eye protection.
To sand your wooden worktop:

- Start with 150 – 180 grit sandpaper, and rub down the entire worktop, including the edges.
- Once you have gone over the entire worktop, use a cloth and vacuum to remove sawdust from the work surface and surrounding area.
- When you are happy that the worktop is free from dust, you can then move onto a finer grit sandpaper and repeat the process.
- For the smoothest finish, it is recommended to sand the worktop 3 or 4 times (with paper of up to 400 grit).
- To ensure your worktop is clean once you are happy with the smoothness of the finish, we would then recommend that you vacuum the worktop and surrounding area, then wipe the wooden worktop down with a slightly damp, lint-free cloth to remove any remaining dust.
- Your worktop is now ready for the application of your chosen treatment – we recommend Osmo Top Oil.
To learn more about this process, please consult our information guide on repairing minor kitchen worktop damage:
And finally… If sanding your worktops at any point, please remember to apply two coats of oil to the face and edges (and more to the endgrains) after you have finished. To find out exactly what is required to oil your worktops effectively, please read our guide on oiling wooden worktops:
Buy Your Sanding and Installation Accessories from Worktop Express:

 65,000+ Reviews | 4.8 TrustScore


