Removing Stains and Discoloration on Wooden Work Surfaces
Wooden work surfaces are a fantastic choice for any kitchen, and whilst the material is hard-wearing and resistant to most minor spills, they can become stained or discoloured if not properly maintained. If your worktop becomes damaged, be sure to work carefully: do not remove more of the finish than is absolutely necessary. In this article, we will take a look at simple techniques to help you remove common stains and discolouration from the surfaces of wooden worktops.
Black spots
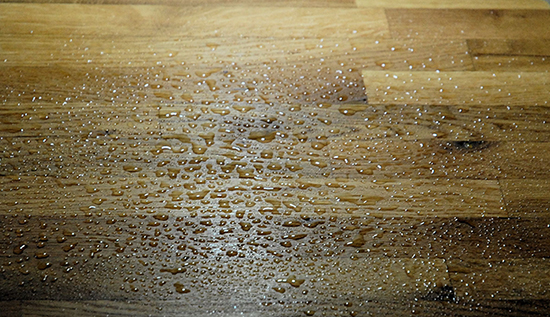
Black spots are usually caused by water that has been left to sit on the surface and has penetrated the finish completely. For black marks and rings, we recommend using Osmo Tannin Spot Remover.
1.Spray evenly onto affected areas for complete coverage
2. Allow 30-45 minutes for the solution to work
3. Wipe clean with a lint free cloth
4. For stubborn spots, repeat the process as needed
5. Finish with a rinse of clean water
6. Ensure thorough drying before applying Osmo oil for long-lasting protection
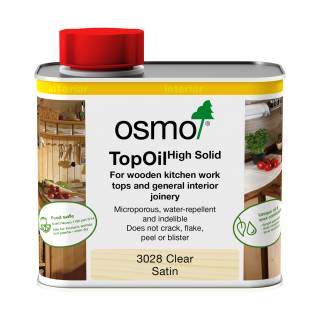
Our Osmo Tannin Spot Remover and Osmo Lint free Cloths are the perfect cleaning combination to help your worktops look as good as new.
Ink stains
Ink stains that have penetrated the finish of your worktop can be removed using a similar re-finishing technique to that used for black spots. Less serious ink stains that have not been absorbed into the timber can be removed by lightly buffing the stained area with a cloth and mineral spirits. Once the stain has dissipated, wipe down the worktop with a clean, damp cloth, then dry the surface thoroughly, and then re-oil or finish as necessary. If the area is badly damaged, the entire worktop surface may have to be refinished.
1. Sand down the affected area until clear
2. Sand down the rest of the surface to re-create a flat, even finish
3. Oil or re-finish to match the original treatment
Grease, tar, paint, crayon, and lipstick spots
Fortunately, these kinds of stains only usually affect the surface of the worktop and can be more easily removed. A natural mineral solvent or a mixture of vinegar and lemon can be used for oil-based paints, whilst water should be sufficient for cleaning latex paint. For anything that has dried on:
1. Use the edge of a putty knife to carefully remove dry paint or other materials; be careful not to use sharp implements or very abrasive materials, or you may scratch the finish.
2. When the deposit has been removed, buff the area very lightly along the grain of the wood with fine-grade sandpaper.
3. Apply a fresh coat of oil to protect the affected area.
Wax and gum spots

Wax and gum deposits can usually be easily removed, but care must be taken to prevent damage to the finish.
1. Firstly, to make the wax or gum brittle, press a packet of ice wrapped in a towel or paper towel against the affected area and let the deposit harden
2. Once hard, it can be lifted off by hand, using finger or thumbnails. We advise avoiding trying to scrape the deposit off, as you could scratch the finish.
3. The hardened wax or gum should pop off the surface with very little pressure. For larger affected areas you may have to repeat the ice application.
If your worktop is damaged and needs to be sanded, we recommend following the guidance:
Repairing Burns
Most commonly burns on wooden kitchen worktops occur when hot pots and pans are set down directly upon the wooden surface without any protection. The charred marks left are often unsightly but can usually be easily removed, though may leave a slight indentation in the wood. Depending on the severity of the burn, you may be able to remove it by simply sanding away the top layer and re-finishing as detailed above.

For deeper burns, you will have to remove the damaged wood, which can be done as follows:
1. Using the flat sharp edge of a craft knife, carefully scrape away the charred wood; for deep burns use a curved blade.
2. Scrape away the burnt fibres until bare, unaffected wood is revealed, feathering out the edges to ensure the repair can be blended into the surrounding timber successfully.
3. Once the charred fibres have been completely removed, lightly sand the edges of the remaining groove to level it with the surrounding surface as much as possible.
4. Press lightly into the groove with fine-grit sandpaper, removing only the burnt fibres from the affected area, being careful not to damage the surrounding finish.
5. If you are unsure that all the burn has been removed, dampen the sanded area. If the burned area reappears underneath a light coating of water, you haven’t removed all the char.
6. Once you are happy that the area is fully cleaned, you may want to fill the resulting groove using a wax wood filler that matches the colour of the surrounding grain.
To avoid burning the worktop in future, we recommend either installing hotrods into routed grooves in the work surface or using a pan stand to ensure hot pots and pans do not come into direct contact with the worktop.
Don’t forget: it’s very important to keep your worktop clean to avoid any permanent staining. You can find out more in our guide.
And finally… Provided that you maintain your worktop correctly, the issues mentioned above should never trouble you – though, saying that, we do appreciate that accidents can happen! If you are concerned about your worktop, please don’t hesitate to contact us before taking any remedial action – particularly soon after installation, when your item may still be in warranty. We’re here to help!

 65,000+ Reviews | 4.8 TrustScore


