Moisture Barrier Installation Instructions
- Moisture Barrier
- Moisture Barrier Tape
- General Purpose Silicone Sealant (Sold Seperately)
Step 1: Preperation
On the bottom side of worktop, mark where the relevant appliance is going to be placed (and therefore the area the moisture barrier needs to cover). When marking this area please leave a gap of approximately 30mm from the front side of worktop.

Step 2: Adhesive
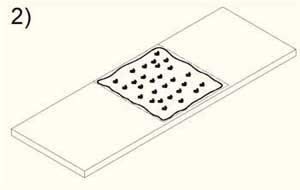
Apply adhesive to the marked area, preferably dotted around evenly as shown.

Step 3: Fixing Moisture Barrier
It is the black side of the moisture barrier (the non-reflective side of the material) that will need to be fixed to the work surface. Place the moisture barrier in the area covered with adhesive (so that the reflective silver surface side is exposed). Rub the moisture barrier in sweeping motions from the centre outwards to the edges, spreading the glue evenly.

Step 4: Sealing with Moisture Barrier Tape
Now that the moisture barrier is firmly fixed to the underside of the worktop, seal the edges with a strip of moisture barrier tape, leaving approximately 5-10mm from the front edge (this will provide an overlapping final protection, covering the edge of the moisture barrier and also the majority of the exposed worktop surface, leaving only a small gap at the edge of worktop).


 65,000+ Reviews | 4.8 TrustScore